Now for the all important raygun tutorial. I'm very sorry that I don't have the step by step photos to show the process from beginning to end but this is super simple.
First, find a squirt/bubble gun at your local discount store. I found these items at Daiso which is a Japanese-based discount store both for $1.50 each that is similar to our 99 cent stores but much more cooler. If you have one near you, go check out Daiso asap because it's awesome. The smaller gun is a bubble gun, your typical cheapie plastic toy. Picture it in its pre-painted state...think bright yellow, orange and green. The bigger gun at the bottom is a squirt gun.
 |
| My first raygun testing the paint and polish. |
I had to research how to paint plastic and had a vague idea when I went to Home Depot of what I needed but the guy directed my to this spray paint which has primer in it so really a one step process. I used Oiled Bronze.
 |
| Paint and Polish. |
Go outside and spray away. Dries quickly in a hour or two then spray the other side. Let dry again. Now, I was stumped as to how to paint/color the trim & other areas on the gun. Once again, Daiso came to the rescue...metallic nail polish for $1.50 each. I got a copper and silver polish.
I added the polish to the areas that I wanted to pop and that was lots of fun. Easy to apply, just go light on the small areas then you can reapply another coat if you want.
That's it! There are lots of ways to do your own personal raygun and this is just one of many. Hope that helps you to find the method that works best for you!
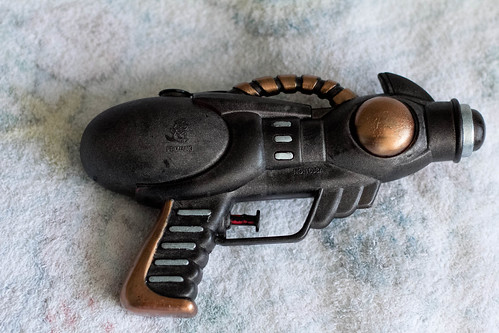 |
| Finished raygun. |
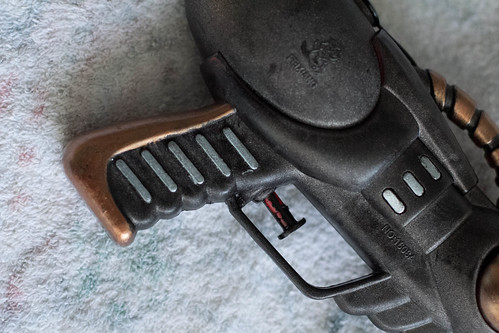 |
| Close up. |
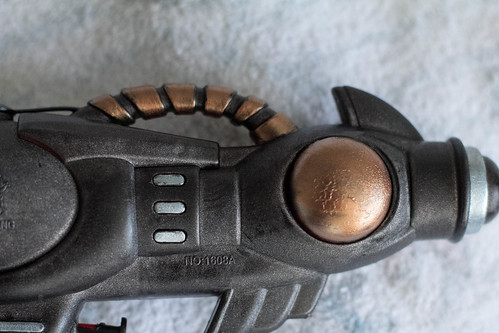 |
| Barrel. |
No comments:
Post a Comment