Showing posts with label DIY. Show all posts

Friday, January 09, 2015

Pickle-rama

A little something different in today's blog which will feature Hector's adventure...but first a little background story.


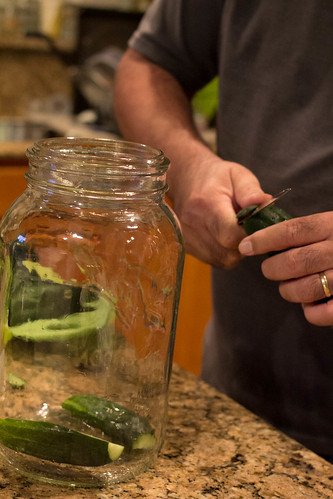
If you watched the snippets of video, this is what sparked the pickle interest. Sure H has always loved pickles but homemade pickles? H is ready for the challenge after doing some research on pickling pickles.

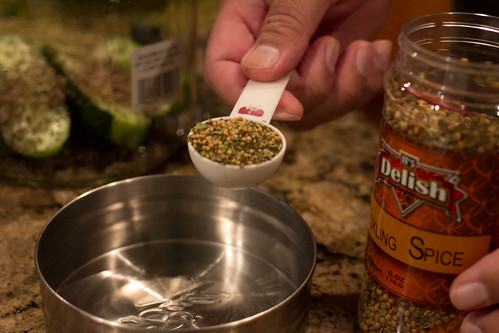
Now all pickles are not created equal and we both love the crunchy dill pickles that Claussen makes...so here is the homemade Claussen knock off pickles recipe that H tries.

It took a few days to gather all the ingredients and find the right size gallon jar but here goes.
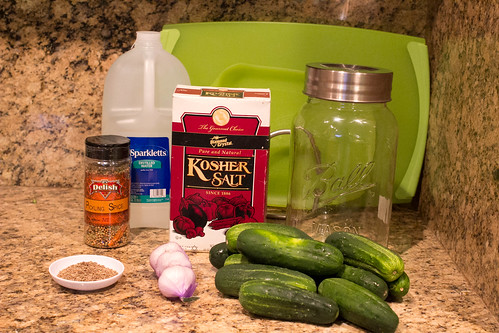
pickle ingredients


IMG_5974.jpg

IMG_5975.jpg

IMG_5976.jpg

IMG_5977.jpg

IMG_5978.jpg

IMG_5979.jpg

IMG_5980.jpg

IMG_5981.jpg

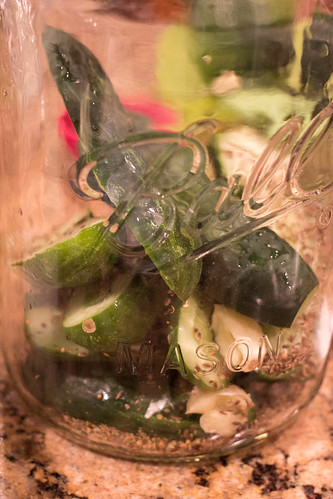
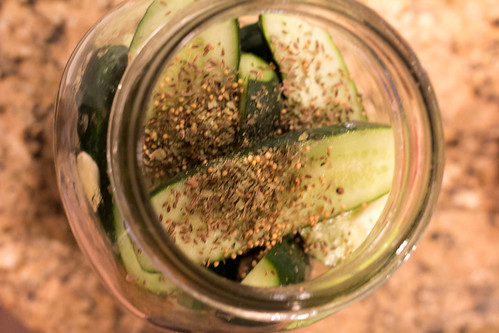
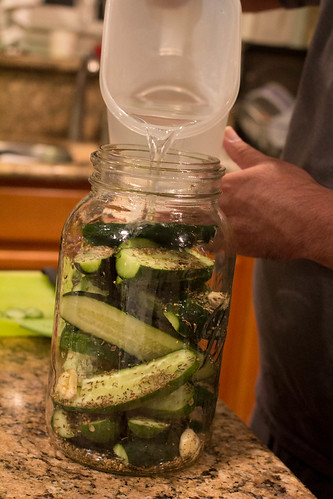
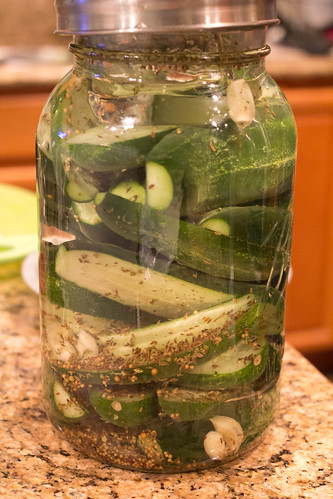
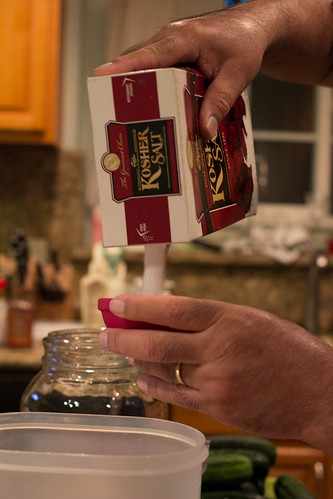
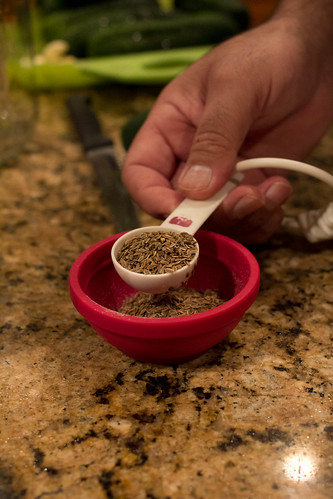
The pickling process in photos...let them sit for 4 days. We tried them on Christmas Eve and I liked them. H thought they needed a few more days (since they were big cucumbers). So after brining some more, H thought this was a success although more garlic is needed. 

Note: there is a second batch pickling and tomorrow, we try them. Pickle-rama!! :)

Monday, March 11, 2013

Steampunk Raygun tutorial: quick and dirty edition

Wonder-Con is fast approaching and I'm still working on the finishing touches on Josh and I's steampunk outfits. Is that wording/grammar correct? Whatever.

Now for the all important raygun tutorial. I'm very sorry that I don't have the step by step photos to show the process from beginning to end but this is super simple.

First, find a squirt/bubble gun at your local discount store. I found these items at Daiso which is a Japanese-based discount store both for $1.50 each that is similar to our 99 cent stores but much more cooler. If you have one near you, go check out Daiso asap because it's awesome. The smaller gun is a bubble gun, your typical cheapie plastic toy. Picture it in its pre-painted state...think bright yellow, orange and green. The bigger gun at the bottom is a squirt gun.

1st Steampunk Raygun
My first raygun testing the paint and polish.


I had to research how to paint plastic and had a vague idea when I went to Home Depot of what I needed but the guy directed my to this spray paint which has primer in it so really a one step process. I used Oiled Bronze.

Rustoleum Universal and Nail Polish
Paint and Polish.

Go outside and spray away. Dries quickly in a hour or two then spray the other side. Let dry again. Now, I was stumped as to how to paint/color the trim & other areas on the gun. Once again, Daiso came to the rescue...metallic nail polish for $1.50 each. I got a copper and silver polish.

I added the polish to the areas that I wanted to pop and that was lots of fun. Easy to apply, just go light on the small areas then you can reapply another coat if you want.

That's it! There are lots of ways to do your own personal raygun and this is just one of many. Hope that helps you to find the method that works best for you!

Steampunk Raygun
Finished raygun.


Grip of steampunk raygun
Close up.


Barrel of steampunk raygun
Barrel.
I'm  debating whether or not to paint the bulbous part at the back of the gun copper but I'll leave it as is.

Thursday, February 21, 2013

California Steampunk

Joshua has a school program called Walkthrough California that is an interactive journey where the kids have parts to read and can dress up. So the setting is early California probably around the missions etc. So I'm trying to come up with a costume for Josh and of course, cowboy comes to mind.

I wanted to be able to use the same costume for our upcoming WonderCon too so I needed versatility too that could be steampunk. That way I can make Josh a steampunk cownboy. :)

Link to DIY reversible childs vest.

My sewing skills are beginner level but I feel pretty confident after the Link costume I made for Halloween so I found a DIY vest tutorial which uses old trousers but I found some remnants at Joanns that worked great. I spent about $7 on fabric, white shirt from Goodwill .99 cents, pants from Goodwill $3, and hat from Party City $8. Grand total = $21. Pretty sweet.

Josh can pass as a rancher/cowboy or as he says vaquero. ;) I added some looped twine we have as a lasso and just fastened it under a pocket flap/snap. Worked great since those pants had no belt loops.

So here are the photos that I quickly shot on the way to school.


Materials for vest
The 2 materials for vest. Josh preferred the stripes.

Serious
"I'm looking for the man who shot my Pa".

loitering cowboy
My favorite shot.
handsome cowboy
Didn't have time to add buttons or pocket flaps but the vest looks sweet.

Now I need to work on some steam punk goggles and a holster/ray gun and Josh will be set for the various cons later this year. :)

Sunday, November 04, 2012

Long Beach Comic Con/Horror Con

I heard about this con on the radio and Hector also brought it up earlier this week and since the kids & I were free on Saturday, we decided to go.

We've been to the Anime Expo a couple of times and last summer we experienced the big mega Comic Con in San Diego just on the fringes and the kids seemed to be more and more interested so a smaller con would be a good starting point.

It's a also a huge plus that Long Beach is practically in our backyard so we didn't have to deal with a long drive with hotel too. This is their first con to dress in cosplay too and I tried to prepare them to take lots of photos and that other people might ask too (but it was for mostly me).


Link and Finn
The kids are ready to hit the con!!
Kids at LBCC
Inside the lobby posing in front of the banner. Heh, I didn't notice Josh cutting off Tyler's face when I shot this!
We got there around 11 am and the floor wasn't too crowded yet. The kids brought their 3DSs to see if they would get any street tags so that added another level of fun to their day.

Link at LBCC
Link
Finn at LBCC
Finn
 
One of the many aisles The exhibit floor

Here are the photos from when we entered the con but by mid afternoon, the place was crowded.

Some serious Lego

LUGOLA

Lego art

 A LEGO section displaying some serious workmanship and creativity.

Lego Moogles
Tyler had to explain some things to me. Like Moogles...in Kingdom Hearts. :)
But on to the cosplay....lots of characters running around and posing for pictures if you ask. :)

Posing
Starting my boys off early to pose with lovely cosplay babes. :)
Wolverine
And Wolverine for the ladies....
There was a long walkway inside to rooms set up for various panels and comfy chairs/sofas to lounge on .


Link and Finn
Checking their 3DSs.
It was  a nice and relaxing con that we walked through the aisles slowly at our own pace to check prices and various things I didn't see the first times.

Link

Finn


Batman and Joker
Some people take their cosplay to another level to be a showstopper.
Josh with Sasquatch
Then everyone wants to take a pic with you.
Links
Several Links at the con but only managed this photo.
The kids had enough at about 4 hours and were ready to leave but overall they had a good experience and
an EPIC BATTLE!!!

Battle

Done for the day

Then they went home....

Thursday, November 01, 2012

Halloween

A short post with not a lot of pics. I was busy getting ready Josh for his Halloween parade and he looked great. After that I had to rush to get the Halloween decorations up in time and get candy.


Halloween Link

Link ready for action

Marceline

Tuesday, October 30, 2012

Shield and Socks

I told you that I was really behind in posting and now I'm serial posting!! Tomorrow is Halloween which brings more busyness so I wanted to bust these out.

For those who have been following Hector's Hylian shield progress, it is now finished. All it needs is some clear sealant.

Hylian shield is finally done!!

Doesn't it look great? Hector did such a great job. I would have gone the cardboard route with this but this is something that will last for quite some time. :) Josh is so excited to have this for Halloween.

Also I finished my Summer Rainbow Lovin socks which what I named it because of the rainbow-like colors of the yarn. The pattern is called Summer Lovin socks and it was super easy. Another pair of socks done in 2 weeks. I'm on FIRE!!

Finished: Summer Rainbow Lovin' socks
Summer Lovin socks

Friday, October 26, 2012

Tweaks

Hector decided that further adjustments needed to be done to the Hylain shield. Upon his inspection, the triforce triangles are not big enough.

So it's more taping...

Adjustments

Prep Work

All masked off and ready to paint some more...


Today, I peeled off the tape which is my contribution although this is entirely Hector's project.

Bigger triforce triangles now

So maybe tonight Hector will start working on the crest ...

Thursday, October 25, 2012

Another Step

Every day or two, Hector makes another step in the progress of the Hylian shield.


Peeling the masking tape off
Peeling away the masking tape for the blue portion.


Last night he drew out the triforce and then taped out the form. Only 2 small areas needed the yellow paint.

It was dry this morning so I used the handy xacto type knife and cut away to peel away the tape.

Voila!! Of course I forgot to take pictures of the before part to show the masking tape but I'll try to remember it for the next part. The Hylian crest.


Hylian shield with triforce
Looks really good

View of Hylian shield in progress
Hylian shield

Monday, October 22, 2012

Weekend Fun

Things have calmed down a bit so we can actually do some fun things around home. Hector has been working on Josh's shield and it's coming together nicely.

Here are some pictures of its progress:

Sparks Pounding

The big boys and their tools getting the shield ready then welding the handles on.

Hylian Shield

Josh with the rough version shield.

Hylian shield: backside

The backside of the shield and you can read what this started as. Hector bought it at the swapmeet for $5.

Link and Finn together

The kids are dressed for their first costume party/Nintendo meetup in Orange County. :)
Link & Finn: 2 heroes

And another photo of the kids. :) They really enjoyed their costumes this year and they still have another chance to wear them and later for all those cons we are now interested in.

Kids with their 3DS

The meetup was in Fullerton near where I grew up about a few blocks away so it was kind of fun.

We got about 30+ tags from gamers so the kids were really happy with that and they're interested in going to more meetups.

Costume Contest: kids division

Here Josh is participating in the kids costume contest. Tyler was in the adults division and placed in the top 6 so he was happy about that. :)


Lord of Games

This guy had a nice robe and crown....and about 1/2 of the adults dressed up. The area we were in in nestled in a  shopping center with a Target across the parking lot. We are in another area with some smaller stores and restaurants like Gamestop and Yogurtland. Lots of seating for hanging out.

Of course, I didn't get a photo of Kat and me dresssed up too but that's okay. We stayed in our costumes later for dinner while the kids changed into regular clothes. We got a few stares at Lomelli's and a big thumbs up too.